Девочки, привет! Сегодня я к Вам с постом- мастер-классом, который я писала для блога Chic Tags. Будем украшать стикеры. Текст на английском, если нужен перевод- напишите в комментах- я переведу. Просто сейчас совсем мало времени и я стараюсь побольше всего успеть сделать:)
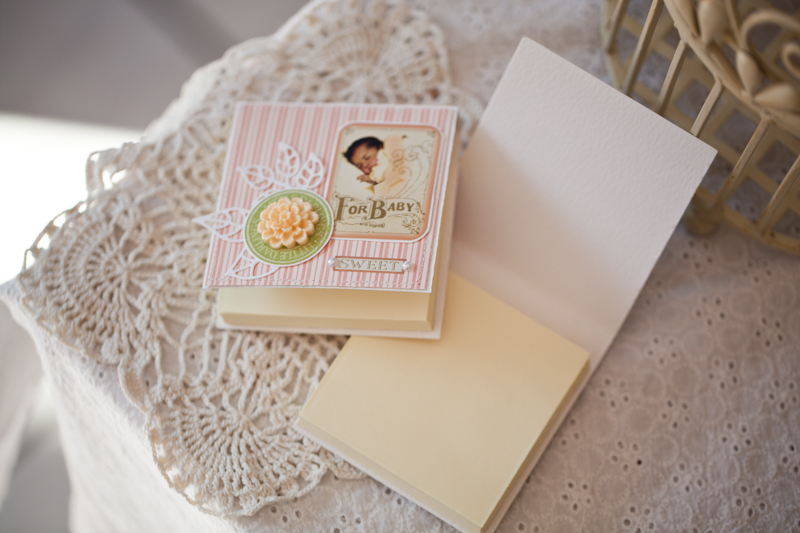
Hello ladies! I want to share with you a quick and easy tutorial for you. We all are girls and love pretty things, so lets decorate post-it stickers:)
Here how they look like when finished, pretty, yes?:)


and this is step-by-step tutorial:
I would like to show you how we can make our post-it stickers to look pretty, yet still functional.


Once again, pressing more firmly fold your paoer on the scored lines


Hello ladies! I want to share with you a quick and easy tutorial for you. We all are girls and love pretty things, so lets decorate post-it stickers:)
Here how they look like when finished, pretty, yes?:)


and this is step-by-step tutorial:
I would like to show you how we can make our post-it stickers to look pretty, yet still functional.
Here is a picture of how it usually starts:

Take your post-it sticker out of plastic and we need a heavy cardstock- i usually use the a4 of watercolor paper and cut it a bit wider then the size of your post it sticker (like 3-4mm more each side)

I usually cut 2 pieces and make 2 of my cute things at once.

Using your scor-pal tool score it, to make a folder for it.

Like that, then cut off the extra white paper

Once again, pressing more firmly fold your paoer on the scored lines

Here the most boring part is finished, now we are ready to decorate them

I chose to go with these colors- its some older papers of Teresa Collins and lovely chic tags (for the list of chic tags materials used, please scroll down to the end of the post)

To decorate your post-its you need to cut the piece of paper a bit narrower then the width of your white base

You need to cut three pieces, so it will fold nicely

Here is the idea how it should look like

Without sticking it to the white base, start your decorating

Here is what I picked to decorate it with

Place it nicely

and the 2nd one

from the coordinating paper i cut some tickets

Before I am 100 percent sure that i will adhere the flair button, i just play with some overlay on it, the way it comes from the shop, so cut your button and start finding it a right place till you are happy/

thats the way i am happy with my elements

When you are done with placing your embellishments, move accurately this piece aside and stick the bottom and the little pieces to their places

and the finish touch- place the post-it sticker inside, also uisng the double side tape.

To see which Chic Tags products I used, please follow this link.
Thank you for stopping by! Hope you will recreate something like this.
Hugs:)